R32
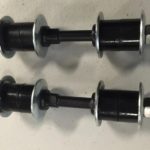

I also took the stock rear end links apart, sanded and painted the stems, and put on new Whiteline bushings, washers, and bolts.
I also took the stock rear end links apart, sanded and painted the stems, and put on new Whiteline bushings, washers, and bolts.
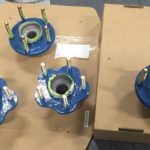

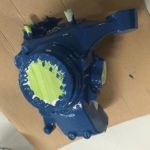
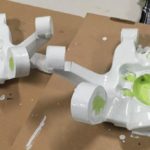
More progress on the R32 suspension… The white is an oil based metal primer, and the blue is a rust prevention metal topcoat.


Studs installed, and hubs primed with metal primer. I also got the front Hicas control valve and lines out. This sits in the engine compartment and makes getting to the oil filter a pain. Off to the recycle bin now!


Wheel studs pressed into the front hubs. Oddly ARP doesn’t list an application for the R32 Skyline, but after a few measurements I determined that EVO VIII studs would work in the front and GM WSK studs would work in the rear hubs.


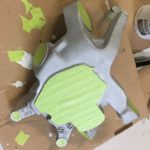
There is something very satisfying about using a blast cabinet to clean up old parts. I used aluminum oxide media, which really cleans up steel. R32 GTR Hub and hub carrier much improved! Next is primer then paint.
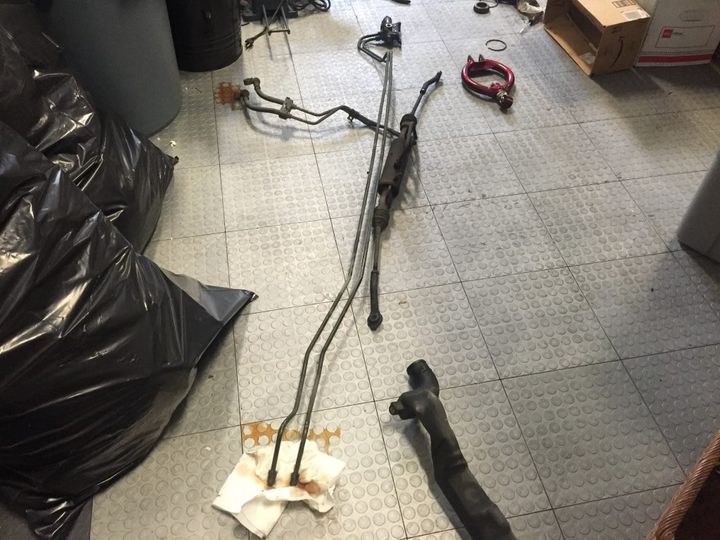
Oh, and while I was ripping stuff out I took out all of the Hicas (4 wheel steering) stuff. There is a lot of parts in that system!


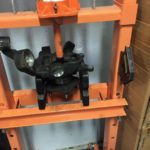
More progress on the R32 suspension rebuild. The kingpin bearings are part of the upper suspension arm, and are theoretically replaceable. Nissan sells the replacement bearings, but the lower bearing is not easy to get out. It is inside a housing that is smaller on the other side, so you can’t get behind the bearing with anything. I got the first one out by using a dremel to slowly cut the bearing in half. That sucked. I got the second one out in 1/20th the time with an impact hammer and a well positioned bit. The smaller upper bearing is a very generic part I could get off Amazon for $7, but the lower bearing is an unusual size (31mm inside), so I had to spend $50 a bearing for those. Fortunately these bearings are the same on the 300ZX so they are available in the US. I also got all the bearings removed from the hubs and carriers, so I just need to get the new front ones and I can start reassembly.

I’m curious if other calibrators have seen slow degradation of AEM map sensors. I installed an AEM 5.2 bar absolute pressure sensor in my 08 STI manifold about 2.5 years ago as part of a build up (documented here: http://forums.nasioc.com/forums/showthread.php?t=2472813 ).
Over the last year I started to notice that my boost was running a bit higher than what I targeted. At first I thought the boost gauge might be off a little bit, but when I added pre and post intercooler sensors it was clear that was not the problem. I noticed before starting the car that the barometric sensor was saying 14.4psi while the MAP sensor was saying 12.9psi. That is a ton of error. I dug around in my logs, and it appears the sensor has been slower degrading and reading lower values. I had a spare sensor that was on Perrin’s 06 STI laying around, and sure enough it also read more then 1 psi low. (similar age). I got a brand new sensor and it was spot on (within about .1 psi of the baro sensor with the engine not running).
Since the MAP sensor is the core sensor for not just boost control but also most of the ECU calculations used for fuel and timing when in speed density the accuracy is important. Since the sensor tends to drift to a lower reading your AFRs would go leaner and timing would likely increase. Not a great combination in a highly tuned car.
I believe the AEM sensor is made by Kavilco, and this particular type of sensor is direct media interacting, so whatever is pushing in the sensor is acting directly on a small film. Over time that film can get damaged, and I would guess that a leak across the film would result in lower readings.
Something to keep in mind if you have one of these sensors on a car for more than a year or two. It is easy to check if you have a newer car that has an independent baro sensor.


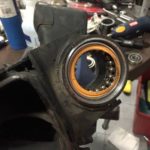
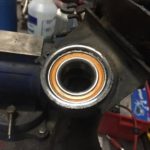
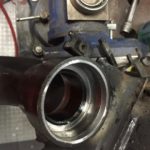
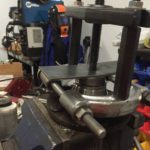
I made some more progress on my R32 Skyline suspension, and the wheel bearings in particular. After some experimentation I was able to get the bearings pressed out of the housings with my 12-Ton press. I now have both the front and rear hubs completely naked… no bearings, bushings, etc. I’ll sand blast the outsides, clean up the insides, paint, and then it is time to install new stuff.
I was able to find a US source for both front and rear wheel bearings, including the clips, seals, and even the king pin setup, so once that arrives it will be reassembly time.
It appears that these hubs had not been disassembled before, at least based on the bearing marks. Even though these bearings were 25 years old, they looked to be in great condition. I just wanted to replace them to be sure.

Hmm which will be better? 88 or 89. 89 is the year I graduated high school so there is that.