R32


The suspension on the R32 GTR is almost back together again. Everything is installed, I just need to torque everything and reassemble the rear parking brake.
The suspension on the R32 GTR is almost back together again. Everything is installed, I just need to torque everything and reassemble the rear parking brake.
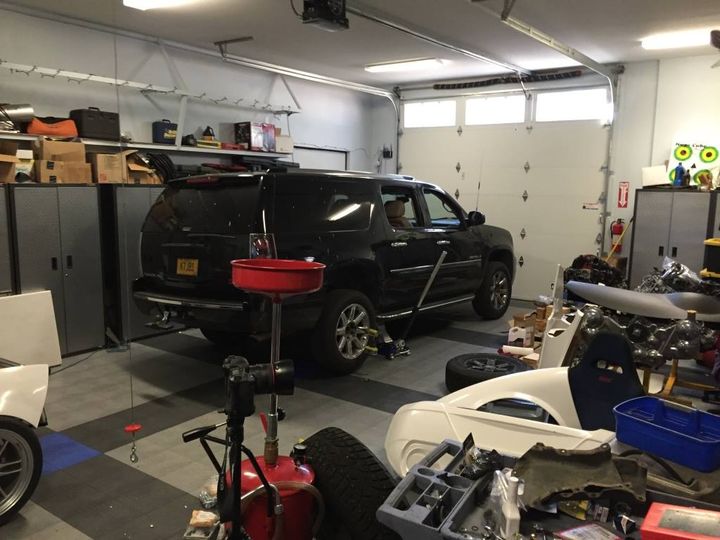
Before heading to Bend, must put snow tires on the Denali!


For those not into mechanically inclined goofs, skip this post!
So I had a good screw up working on the R32 Skyline today. I was ready to build the front hubs, so I cooled the bearings and the stubs in the freezer. The outer bearing race gets pressed into the hub and held in by both friction as well as a set of circlips. The clips are small steel rings with cut outs that allow you to get a screwdriver behind them to pry them out. This will be important later. 🙂
I warmed the hubs up a bit, and started by installing one of the clips in the outer face side. I pressed the outer bearing race into the hub without problem, and then installed the second clip on the other side. The clips I used were the new ones that came with the bearing, not the ones that came out of the hub. I didn’t notice the difference, and they snapped in just fine. Next up I pressed the stub (the part with the lugs sticking out) into the hub (and the inner races of the bearing). That went fine as well.. except right as I finished I realized I forgot to install the seal first. The seal goes on the hub after the bearing, but before you press the stub in. I quickly flipped the hub over and pressed the stub back out, but of course when you do that the lower part of the inner race stays on the stub. I remembered that most bearing manufacturers say that if you need to remove the inner race from a stub, you should replace the entire bearing. The reason is the inner race cage will distort some as you press it off the spindle. In this case I had just pressed it on, and the spindle was still freezing… so it came off without a lot of effort. At this point I’m thinking that I should go ahead and replace the bearing, since the whole point of this exercise it to have fresh reliable bearings in an old car. The bearing manufactures also recommend that you replace the bearing if you ever have to press against the inner race while it is installed, as that can leave small micro depressions in the race surface.
I go inside and order up a new bearing from the UK and head back out to get the outer race removed from the hub. Then the second gotcha smacks me in the noggin. The ‘clips’ I used that came with the bearing were slightly thinner than the the original ones (in the radial direction). This means once they popped into the grooves, they went farther in such that you can’t get to the removal cutouts anymore. I spent an hour trying to get behind them but to no avail. They are a hardened spring steel and the inset in the hub is dimensionally just the right size the snug them in. They are not coming out.
At this point I’m stuck, as I can’t get the bearing out of the hub to replace it. I go ahead and reassemble the whole thing, with the seals this time, so at least I have something to complete the rest of the work with. The bearing as assembled feels fine, but if you know me you know it would drive me crazy to know that it could be a ticking bomb. Onto eBay I went to find a replacement hub for a 25 year old car. I found one in Australia, of course shipping was as much as the part.
Once the old/new one comes in I’ll refurbish it just like these and replace. Oy vey.
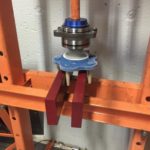
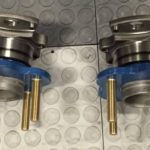
Installing the restored and cleaned up stubs into the rear bearings. Since it is a very tight fit, I put the stubs in the freezer overnight, and heated the bearing carrier a bit before pressing. It went in super easy! These are ready to install onto the rear spindles. Up next is pressing the front bearings into the hubs… and those too are in the freezer to help out. When I took measurements of the hub and bearing at room temperature, the bearing was about 2/10,000ths larger than the hole it is supposed to go in, which is certainly a bit of an interference fit.
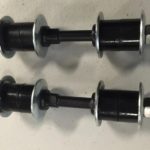

I also took the stock rear end links apart, sanded and painted the stems, and put on new Whiteline bushings, washers, and bolts.
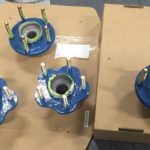

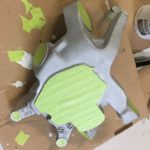
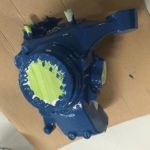
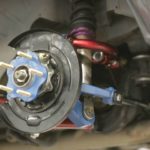
More progress on the R32 suspension… The white is an oil based metal primer, and the blue is a rust prevention metal topcoat.


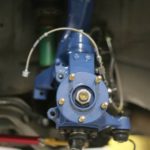
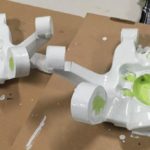
Studs installed, and hubs primed with metal primer. I also got the front Hicas control valve and lines out. This sits in the engine compartment and makes getting to the oil filter a pain. Off to the recycle bin now!


Wheel studs pressed into the front hubs. Oddly ARP doesn’t list an application for the R32 Skyline, but after a few measurements I determined that EVO VIII studs would work in the front and GM WSK studs would work in the rear hubs.